
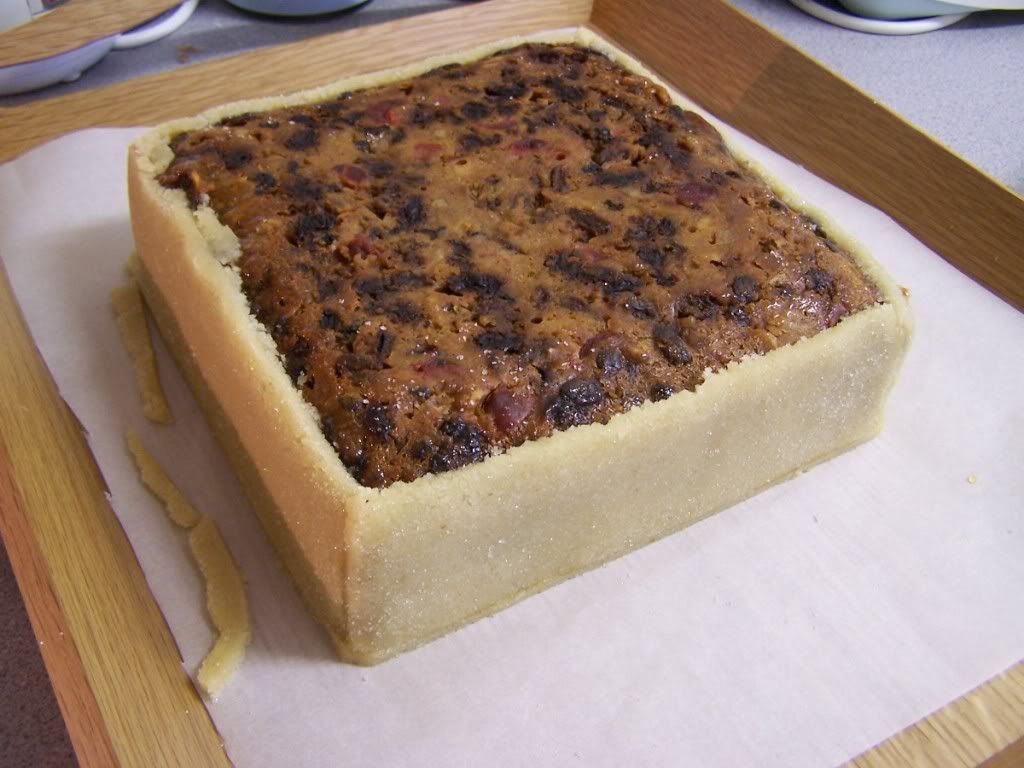
I peeled off the foil and paper and turned the cake upside down. You're aiming to get the flattest, smoothest surface for your icing, so it makes sense to trim the top so it makes a stable base and invert it. Right, now the cake is ready, assemble your tools. You will need:-
- A quantity of marzipan (aka almond paste). I use Katie Stewart's recipe, but choose your favourite.
- a rolling pin
- caster sugar
- a small, sharp knife
- a cake board, one of the foil covered kinds, or the base of a cake tin
- a sturdy board or tray
- a sheet of baking or greaseproof paper
- apricot jam
- pastry brush
- tea strainer or sieve
Right, first thing's first - a disclaimer. I am going to post some photographs of my cake below, but before I do you need to understand the point of marzipan on a Christmas cake. Its purpose is actually two-fold. Firstly to prevent the dark fruit in the cake from leaking through and staining the pristine white icing. Secondly it is the foundation on which the icing is laid. Think of it like magic underwear, if you will. It may be ugly and you wouldn't really want anyone to see it, but it is essential to make your body look its best under the dress. So excuse the patches and fill-ins - they're just structural to make sure the icing has a lovely, even base.
OK, now, put a couple of large spoonfuls of the apricot jam into the tea strainer and squish it through into a small bowl. All you're aiming to do it create a smooth 'glue' for the marzipan. When you're done, use the pastry brush to paint some of the strained jam onto the top of the cake (and by top, I actually mean bottom, because you inverted it. Confused yet? I do hope not.)
Now take the marzipan and mark it into thirds. Chop one third off and set the remainder to one side. Sprinkle your work surface with caster sugar and roll out the marzipan so it is an even thickness just a little larger than the surface of the cake. Now lay the sheet of baking paper down on the tray or board and carefully place this rolled out piece of marzipan on top of it. (If you're using a board rather than a tray, then you may even be able to roll it out in situ, if that's easier).
Now gently lift the cake and, making sure it's not overhanging the edge of the marzipan anywhere, lay it top down on the rolled out marzipan. Press down lightly and leave.
Now, take the remaining icing.
If your cake is circular you'll need to take a piece of string, measure the circumference of the cake and roll the marzipan into a long sausage, roughly the same length as the piece of string. flatten it down, roll it out, trim one side and the bottom so they're neat, straight lines. Paint the sides of the cake with the apricot jam to stick down any loose crumbs and make sure the marzipan has something to stick to. Roll the marzipan up on your rolling pin and lay it carefully along the side of the cake, trimmed side down so that it sits on the marzipan top. Wrap the icing around the cake until it meets itself, then neatly trim the end off, so the two ends butt up against each other. Trim any excess off the height of the marzipan.
If, like me, you have a square cake, you'll find life is much easier. Divide the remaining icing into four equal pieces. Roll each of these pieces out so that it's very slightly longer and taller than one side of the cake. Paint the side of the cake you're about to marzipan with the apricot jam to stick down any loose crumbs and make sure the marzipan has something to stick to. Trim one side and the bottom, then lay the marzipan gently against the side of the cake, trimmed bottom resting on the marzipan overhang, the trimmed edge lined up with one edge of the cake. Trim off the excess marzipan at the top and side, making sure the edges line up, then repeat for the other three sides.
Now very carefully use your sharp knife to trim the overhang of the top marzipan. Use any offcuts to make up gaps along the edge of the cake.
Place the cake board on the bare 'top' of the cake, making sure to centre the cake carefully.
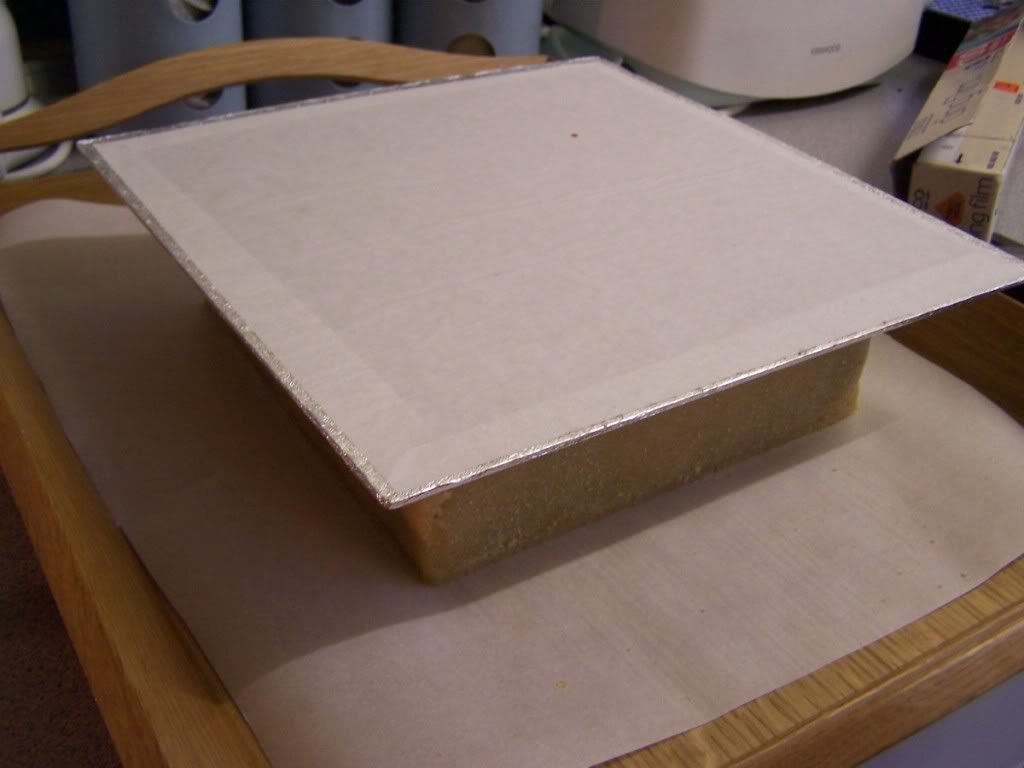
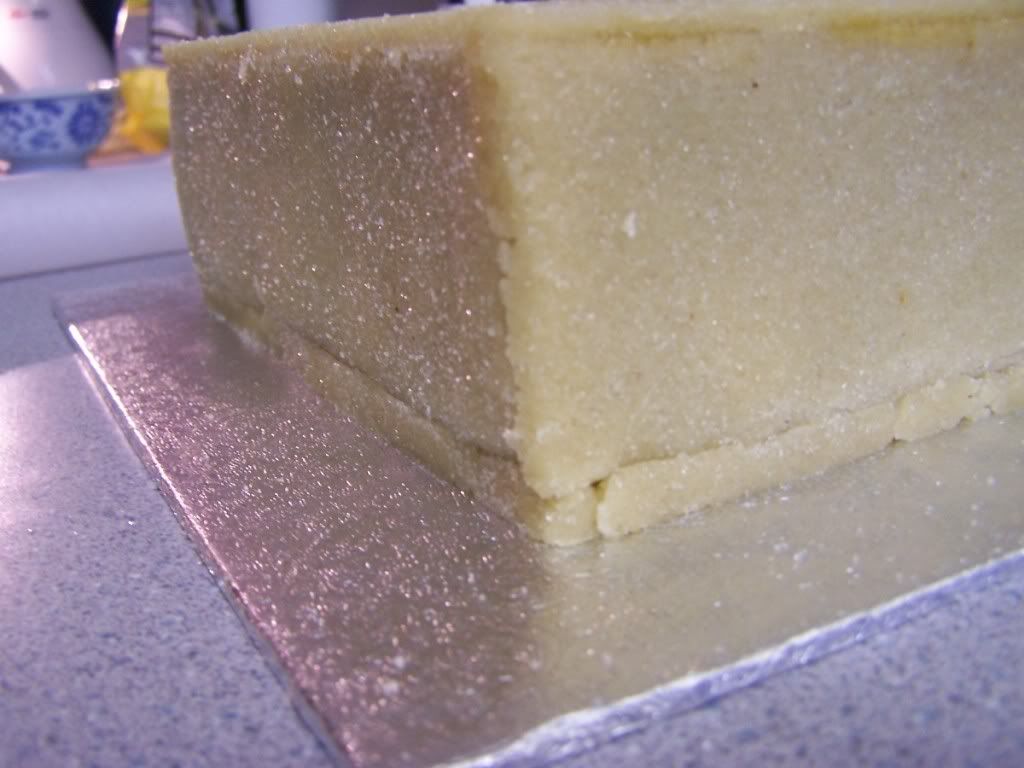
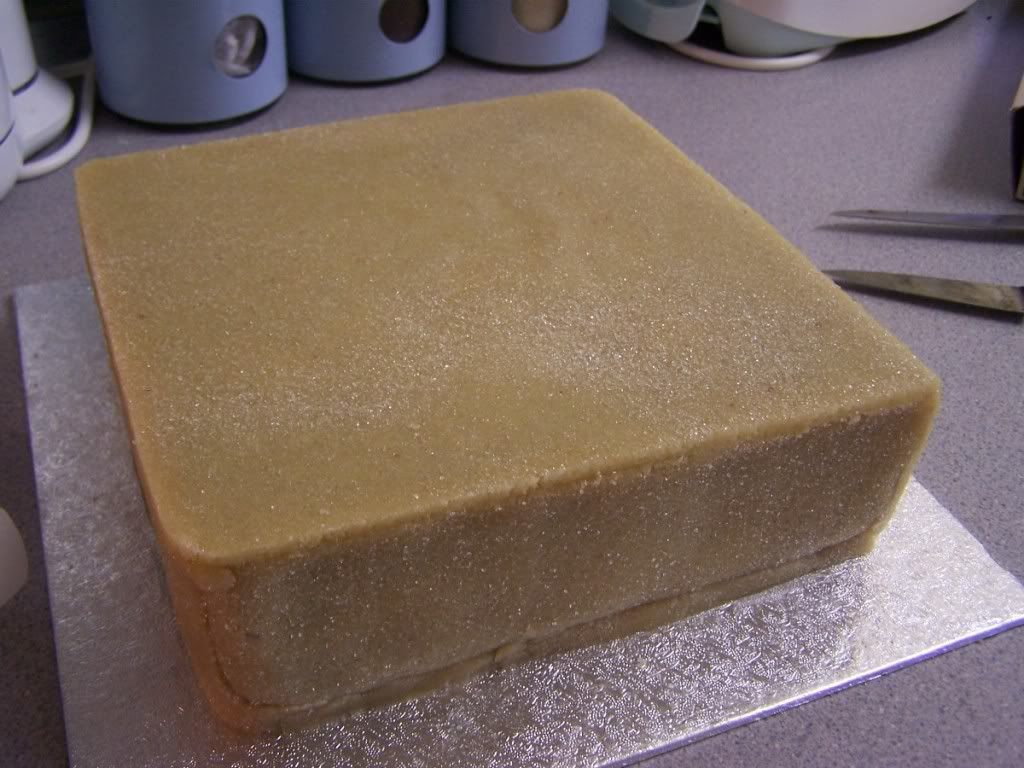
Slide the tray carefully off the surface and place the flat of your hand under it. Now place your other hand flat on the top of the board and, maintaining a reasonable amount of pressure, invert the cake again. Place the board back on the surface and remove the tray and the sheet of paper. Ta dah! A marzipanned cake. Any slight inconsistencies in the eveness can be made up now with the offcuts of marzipan, as you can see, there is often a gap around the bottom, as with mine, but that's easily remedied and the royal icing will cover up the unsightliness.
Now place the sheet of baking paper on the top, weight it down with something light (I used a roll of sellotape which was to hand!) and place in a warm, airy place for at least a few days, if not a week. You're just aiming to dry the marzipan off so it hardens slightly, making it easier to ice, the paper is just to keep the dust off whilst it dries.
And there you have it!

OOh that looks bootiful!
ReplyDelete